
We Tested:
You’ve just pulled a beautiful ribeye off the grill. It looks perfect—deep mahogany crust, glistening surface, the kind of sear that makes Instagram foodies weep. You slice into it. Gray. Well-done. Again.
Or maybe it’s the opposite: you served chicken that looked golden and juicy, only to discover a rosy pink center that sends your dinner guests reaching for their phones to Google “salmonella symptoms.”
Here’s the uncomfortable truth: you cannot tell if meat is safely cooked by looking at it. Not by color, not by juices, not by time. A 2026 outbreak of E. coli across multiple U.S. states sickened people who relied on visual cues and “instinct” instead of a thermometer. The only reliable way to know your meat is both safe and perfectly cooked is to measure its internal temperature.
A meat thermometer costs less than a single steak dinner. Yet it’s the one kitchen tool that separates consistent, confident cooking from culinary Russian roulette. This guide will teach you exactly how to use one—not just the basics, but the nuanced techniques that professional chefs use to nail doneness on everything from a paper-thin pork cutlet to a 12-pound holiday roast.
Why Meat Thermometers Matter More Than Ever in 2026
The Science of Doneness (It’s Not Just About Safety)
Most people buy a meat thermometer for food safety. That’s valid—undercooked poultry and ground meat can harbor dangerous pathogens. But here’s what the best cooks know: a thermometer is primarily a flavor and texture tool.
Meat is composed of muscle fibers, connective tissue, and fat. As heat penetrates, proteins denature and contract, squeezing out moisture. At a certain point—different for every cut and every animal—the meat reaches peak juiciness and tenderness. Push past it, and you’re eating shoe leather.
Consider this: a pork loin cooked to 145°F is juicy, slightly pink, and deeply flavorful. The same loin cooked to 160°F (the old USDA recommendation from decades ago) is dry, pale, and forgettable. The difference is 15 degrees. You cannot detect that 15-degree window with your eyes or a timer. A thermometer finds it in seconds.
The Hidden Cost of Guesswork
Think about the last time you overcooked a $40 prime rib because you were afraid of serving it rare. Or the time you cut into a chicken breast five times to check doneness, releasing precious juices and ending up with dry meat anyway. Each of those failures has a cost—financial, yes, but also the quiet erosion of confidence in your own cooking.
A thermometer eliminates that anxiety. It replaces “I hope this is done” with “I know this is done.”
The Complete Guide to Meat Thermometer Types (2026 Edition)
Not all thermometers are created equal. Using the wrong type for your cooking scenario is like using a sledgehammer to hang a picture frame—technically possible, but unnecessarily messy.
Instant-Read Thermometers: The Workhorse
Best for: Steaks, chops, burgers, chicken breasts, sausages, meatballs, and any quick-cooking cut.
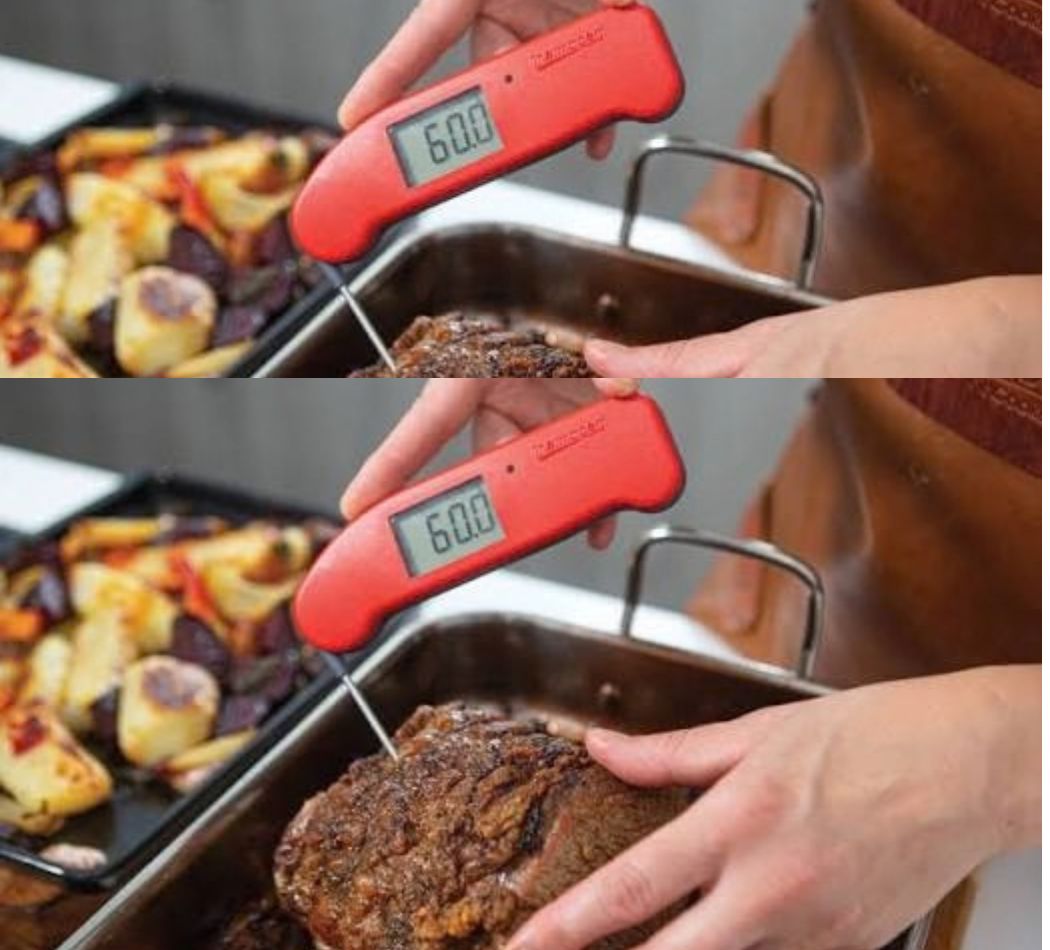
An instant-read thermometer is designed for spot checks near the end of cooking. The sensor sits at or near the tip, allowing you to probe multiple locations quickly. The best modern models, like the ThermoWorks Thermapen One, deliver a full reading in one second with accuracy of ±0.7°F.
What to look for:
-
Response time: Under 3 seconds is excellent; under 1 second is elite.
-
Accuracy: ±1°F or better.
-
Waterproof rating: IP67 or higher for easy cleaning.
-
Calibration capability: Some models allow you to adjust if readings drift.
Leave-In Probe Thermometers: The Set-and-Forget Solution
Best for: Roasts, whole birds, pork shoulder, brisket, ham, and any low-and-slow cook.
A leave-in probe stays in the meat throughout cooking, with a heat-resistant cable running to a display unit outside the oven or grill. This lets you monitor temperature without repeatedly opening the oven door (which releases heat and extends cooking time).
Modern wireless models like the Meater Pro and ThermoWorks RFX eliminate the cable entirely, transmitting readings via Bluetooth or Wi-Fi to your phone. The smart meat thermometer market is projected to grow from $642 million in 2025 to $832 million by 2032, driven largely by these wireless innovations.
What to look for:
-
Oven/grill-safe temperature rating for the probe and cable.
-
Wireless range: At least 100 feet for outdoor cooking.
-
Multi-probe capability: Essential if you’re cooking different items simultaneously.
-
App quality: A thermometer is only as good as its companion app.
The One-Two Punch: Why Serious Cooks Own Both
If you’re serious about cooking, you need both an instant-read and a leave-in probe. The leave-in tracks your roast through the long haul. The instant-read confirms doneness in multiple spots at the end—because large cuts don’t heat evenly, and the center of the roast might be 145°F while a spot near the bone is still 138°F.
Analogy: Think of the leave-in probe as your GPS for a long road trip. The instant-read is your parking sensor when you finally arrive. You need both to navigate successfully.
How to Use a Meat Thermometer Correctly: The Step-by-Step Method
Step 1: Choose Your Target Temperature
Before you even turn on the heat, know your destination. Here are the USDA-recommended safe minimum internal temperatures for 2026:
| Protein | Minimum Internal Temperature | Rest Time |
|---|---|---|
| Beef, pork, veal, lamb (steaks, chops, roasts) | 145°F (62.8°C) | 3 minutes |
| Ground meats (beef, pork, veal, lamb) | 160°F (71.1°C) | None |
| All poultry (whole, pieces, ground) | 165°F (74°C) | None |
| Ham (fresh or smoked, uncooked) | 145°F (62.8°C) | 3 minutes |
| Fish and shellfish | 145°F (62.8°C) | None |
Critical nuance: These are minimum safe temperatures. For optimal eating quality, many cooks pull meat slightly below these targets and rely on carryover cooking (more on that shortly). A steak pulled at 130°F will rise to 135°F during rest—perfect medium-rare. A chicken breast pulled at 160°F will coast to 165°F.
Step 2: Find the Thermal Center
The thermal center is the coolest part of the thickest section of the meat. This is the last place heat reaches, so it’s the most accurate indicator of overall doneness.
How to find it:
-
For a steak or chop: Insert horizontally from the side into the center of the thickest portion.
-
For a roast or whole bird: Insert from the top or side into the deepest part of the breast or thigh, avoiding the cavity.
-
For a burger: Insert from the side into the center, not from the top.
Step 3: Avoid the Three Enemies of Accuracy
Three things will give you a false reading:
-
Bone: Bone conducts heat differently than muscle. A probe touching bone will read higher than the surrounding meat. For bone-in cuts, aim for the thickest meaty area, well away from the bone.
-
Fat: Large pockets of fat insulate and heat more slowly than muscle. A probe in fat will read lower than the meat around it.
-
Gristle and connective tissue: These dense tissues also skew readings.
Step 4: Insert to the Correct Depth
Different thermometers have different sensing area requirements. A thermocouple or thermistor instant-read thermometer may only need ¼ to ½ inch of insertion depth. A traditional dial thermometer may need 2 to 2½ inches.
Pro tip: Read your thermometer’s manual. The most common mistake is inserting too shallow, which reads the surface temperature (which is much higher) rather than the internal temperature.
Step 5: Wait for the Reading to Stabilize
Even the fastest thermometers need a moment. For instant-read models, wait 2–5 seconds after insertion. For dial thermometers, wait 15–20 seconds. The reading should stabilize before you trust it.
Step 6: Check Multiple Locations
This is non-negotiable for large or irregular cuts. A whole chicken might read 165°F in the breast but only 155°F near the thigh joint. A beef roast might have a 10-degree gradient from center to edge. Check at least three locations for any cut thicker than 2 inches.
The Carryover Cooking Secret Most Guides Miss
Here’s where home cooks and professional chefs diverge most dramatically: carryover cooking.
When you remove meat from heat, the internal temperature continues to rise for several minutes. The exterior is hotter than the interior, and heat energy migrates inward until equilibrium is reached. For a large roast, carryover can add 5 to 15 degrees after removal from the oven.
The practical application: If you want a final serving temperature of 145°F for a pork loin, pull it at 135–140°F. Tent it loosely with foil and let it rest. The temperature will climb to your target while the juices redistribute.
For steaks and chops: Carryover is smaller—typically 3–5 degrees. Pull a steak at 125°F for medium-rare (final 130°F). Rest for 5–10 minutes.
For large roasts: Pull at 10 degrees below target. A 5-pound beef roast destined for 135°F should come out at 125°F and rest for 20–30 minutes.
This single technique is the difference between meat that’s technically safe and meat that’s memorably delicious.
Common Mistakes (and How to Fix Them)
Mistake #1: Not Calibrating Your Thermometer
Thermometers drift over time, especially if dropped or exposed to extreme temperatures. A thermometer that reads 5 degrees high will cause you to consistently overcook. One that reads 5 degrees low is a food safety hazard.
The fix: Perform an ice bath test monthly. Fill a glass with crushed ice and cold water. Stir for 30 seconds. Insert the probe at least 2 inches deep (or past the safety notch for wireless probes) without touching the sides or bottom. After 30 seconds, it should read 32°F (0°C). If it’s off by more than 2 degrees, calibrate it if possible or replace it.
Mistake #2: Measuring the Wrong Spot
The most common error is probing the surface or a thin edge instead of the thermal center. The surface of a grilled steak can easily be 200°F while the center is 130°F.
The fix: Use the “side insertion” technique for thin cuts. Insert horizontally through the side so the sensor sits in the geometric center of the meat.
Mistake #3: Skipping the Rest
Cutting into meat immediately after removing it from heat causes juices to run out onto the cutting board instead of redistributing through the muscle fibers. You lose moisture and flavor.
The fix: Rest all meat. Small cuts (steaks, chops): 5–10 minutes. Medium roasts: 15–20 minutes. Large roasts (prime rib, whole turkey): 20–30 minutes. The meat will stay hot, and the carryover cooking will finish the job.
Mistake #4: Using the Wrong Thermometer for the Job
An instant-read thermometer left in a 400°F oven will be destroyed. A leave-in probe used to check a thin burger will give inaccurate readings. A dial thermometer used for quick checks on chicken breasts is too slow and requires too much insertion depth.
The fix: Match the tool to the task. Instant-read for quick checks. Leave-in probe for long cooks. Wireless for smoking and grilling.
Mistake #5: Forgetting Cross-Contamination
A thermometer probe inserted into raw chicken and then into cooked meat without cleaning is a food safety disaster waiting to happen. The probe transfers bacteria directly into the food you’re about to serve.
The fix: Wash the probe with hot, soapy water for at least 20 seconds after every use, especially between raw and cooked foods. Keep a spray bottle of sanitizer nearby for quick cleaning during grilling sessions.
Practical Tips from Professional Kitchens
Tip 1: The “Two-Temperature” Method for Poultry
For whole chickens and turkeys, check both the breast (target 165°F) and the thigh (target 175°F). The thigh needs to be hotter because it contains more connective tissue that requires higher temperatures to break down into gelatin. If you cook the whole bird to 165°F in the breast, the thigh will be tough. If you cook to 175°F in the thigh, the breast will be dry. The solution: ice the breast before roasting, or spatchcock the bird for even cooking.
Tip 2: Plant-Based Meat Needs a Thermometer Too
A common misconception is that plant-based burgers don’t need temperature checking. They absolutely do. Most manufacturers recommend cooking to 160–165°F to ensure food safety, even though the pathogens involved may differ from those in animal meat.
Tip 3: Bread Is Meat’s Cousin
Your meat thermometer is also a bread thermometer. Most yeast breads are fully baked at an internal temperature of 190–210°F, depending on the dough’s hydration and enrichment. A thermometer removes the guesswork from “is it done?”.
Tip 4: Ambient Temperature Matters for Smoking
When using a leave-in probe in a smoker, the probe measures meat temperature, but you also need to know the cooker’s ambient temperature. Dual-probe thermometers solve this by monitoring both. For cold smoking (cheese, salmon), ambient temperature should stay below 85°F, and the meat probe can verify the product hasn’t inadvertently warmed into the danger zone.
Tip 5: The Ice Bath Is Your Quality Control
Before any important cook—holiday dinner, backyard barbecue competition, date night—run a 30-second ice bath test. It takes less time than preheating the oven and gives you total confidence in your readings.
Pros, Cons, and the Balanced Truth About Thermometers
Pros
-
Consistency: The same cut cooked to the same temperature yields the same result every time.
-
Safety: Eliminates the risk of serving undercooked poultry or ground meat.
-
Quality: Prevents overcooking, preserving moisture and flavor.
-
Versatility: Works for meat, bread, custards, oil, chocolate, and more.
-
Confidence: Transforms cooking from anxiety-inducing guesswork into a controllable process.
Cons
-
Learning curve: Proper placement and technique require practice.
-
Cost: Quality thermometers range from $40 to $150+.
-
Battery dependence: Digital models die at inconvenient times.
-
App fatigue: Wireless thermometers with apps can be over-engineered for simple tasks.
-
False precision: A 0.1-degree display doesn’t mean the reading is accurate to 0.1 degrees.
The Balanced Verdict
A meat thermometer is not a crutch for inexperienced cooks. It’s a precision tool for anyone who cares about results. The best cooks in the world use thermometers—not because they can’t tell when meat is done, but because they know that human senses are unreliable and consistency is king.
The Future of Meat Thermometers: 2026 and Beyond
The meat thermometer is undergoing a quiet revolution. Here’s what’s coming:
AI-Powered Doneness Prediction
Modern wireless thermometers already use algorithms to predict when meat will reach target temperature. The next generation will learn your preferences—how you like your steak, your preferred brisket texture—and adjust recommendations accordingly.
Multi-Probe, Multi-Zone Cooking
Smart thermometers with 4–6 probes are becoming standard for serious home cooks. You can monitor a brisket, two racks of ribs, and the smoker’s ambient temperature simultaneously, all from your phone.
Integration with Smart Kitchen Ecosystems
Thermometers are increasingly connecting with smart ovens, grills, and voice assistants. Imagine your oven automatically adjusting temperature based on the probe’s reading, or your smart speaker announcing “Your pork loin has reached 140 degrees—time to rest.”
Infrared and Contactless Sensing
Infrared thermometers are being integrated into leave-in probes, providing rapid surface temperature readings to complement internal measurements. This dual-sensor approach improves accuracy by accounting for thermal gradients.
Sustainability and Longevity
Manufacturers are responding to consumer demand for repairable, recyclable devices. Modular probes and replaceable batteries are becoming more common, extending product lifespans and reducing electronic waste.
The market data confirms it: smart thermometer adoption is accelerating across North America, Europe, and Asia-Pacific, driven by precision cooking trends and smart home integration.
Key Takeaways: Your Meat Thermometer Cheat Sheet
-
Buy both types: An instant-read for quick checks and a leave-in probe for long cooks.
-
Calibrate monthly: The ice bath test takes 30 seconds and prevents 30 degrees of error.
-
Target the thermal center: Insert into the thickest part, away from bone, fat, and gristle.
-
Pull early, rest long: Carryover cooking adds 5–15 degrees during rest.
-
Check multiple spots: Large cuts don’t heat evenly.
-
Clean between uses: Cross-contamination is a real and preventable risk.
-
Know your temperatures: 145°F for whole cuts, 160°F for ground meat, 165°F for poultry.
-
Thermometers aren’t just for meat: Bread, custards, oil, and plant-based proteins all benefit.
Frequently Asked Questions
Can I leave my meat thermometer in the oven?
Only if it’s explicitly rated as oven-safe. Instant-read thermometers are not designed to stay in the oven. Leave-in probe thermometers have a heat-resistant cable and probe that can withstand oven temperatures, but the display unit must remain outside the heat source. Always check your manufacturer’s temperature limits.
How often should I calibrate my meat thermometer?
Monthly for regular home cooks. Weekly for frequent grillers or smokers. After any drop or exposure to extreme temperatures. The ice bath test is quick and definitive.
What’s the difference between a meat thermometer and a candy thermometer?
Candy thermometers are designed for high-temperature sugar work (up to 400°F+) and often have a narrower temperature range optimized for sugar crystallization stages. Meat thermometers prioritize fast response and easy insertion into protein. Some high-end instant-read thermometers can do both, but don’t assume your meat thermometer is suitable for candy-making unless it’s rated for those temperatures.
Can I use a meat thermometer for plant-based meat?
Yes, and you should. Most plant-based meat manufacturers recommend cooking to 160–165°F for food safety, even though the pathogens differ from animal meat. The same placement principles apply.
How do I know if my thermometer is accurate?
The ice bath test is the gold standard. If the reading is off by more than 2°F, check if your thermometer has a calibration function. If not, replace it. A thermometer that reads inaccurately is worse than no thermometer at all—it gives you false confidence.
What temperature should I cook chicken to?
165°F (74°C) for all poultry—whole birds, pieces, and ground poultry. This is the USDA minimum safe temperature. For the juiciest chicken breast, pull at 160°F and let it rest for 5 minutes; carryover will bring it to 165°F.
Why does my thermometer read different temperatures in different spots?
Because meat doesn’t heat uniformly. The center of a roast is cooler than the edges. A spot near bone may be hotter or cooler depending on bone density and proximity to the heat source. Always check multiple locations and use the lowest reading for safety decisions.
Sources
-
Niman Ranch. “How to Use a Meat Thermometer for Different Cuts of Meat.” July 2026.
-
USDA Food Safety and Inspection Service. “Safe Minimum Internal Temperature Chart.” April 2025.
-
Tasting Table. “3 Mistakes You’re Making With Your Meat Thermometer (And How To Avoid Them).” April 2025.
-
Traeger Support. “Ice Bath Test for Meat Probes.” September 2025.
-
Food Network. “5 Best Meat Thermometers of 2026, Tested and Reviewed.” July 2026.
-
Serious Eats. “You’ll Never Undercook or Overcook Meat Again with These Meat Thermometers.”
-
The Takeout. “The Overlooked Step In Cooking That’s Secretly Sabotaging Your Meals.” December 2025.
-
Daily Meal. “What Should The Internal Temperature For Cooked Plant-Based Meat Be?” June 2024.
-
ThermoWorks. “Perfect Baked Goods Guide: Temperature Chart.” February 2026.
-
Market Research. “Global Smart Meat Thermometer Market Growth 2026-2032.” July 2026.
-
Christian Today. “E. coli contaminated beef sickens 14.” August 2026.

Novara Lin
Senior Editor & Clean Beauty Analyst
Novara Lin is a clean beauty researcher and wellness editor dedicated to demystifying modern skincare and evidence-based living. With a background in formulation science and consumer health reporting, she specializes in analyzing complex ingredient profiles, evaluating product safety, and bridging the gap between clinical research and daily self-care routines. Her work focuses on helping readers cut through industry noise to build minimal, highly effective routines rooted in transparency and skin health. When she isn’t testing active formulations or auditing non-toxic household choices, Novara leads editorial strategy for NovaRa Pure.