
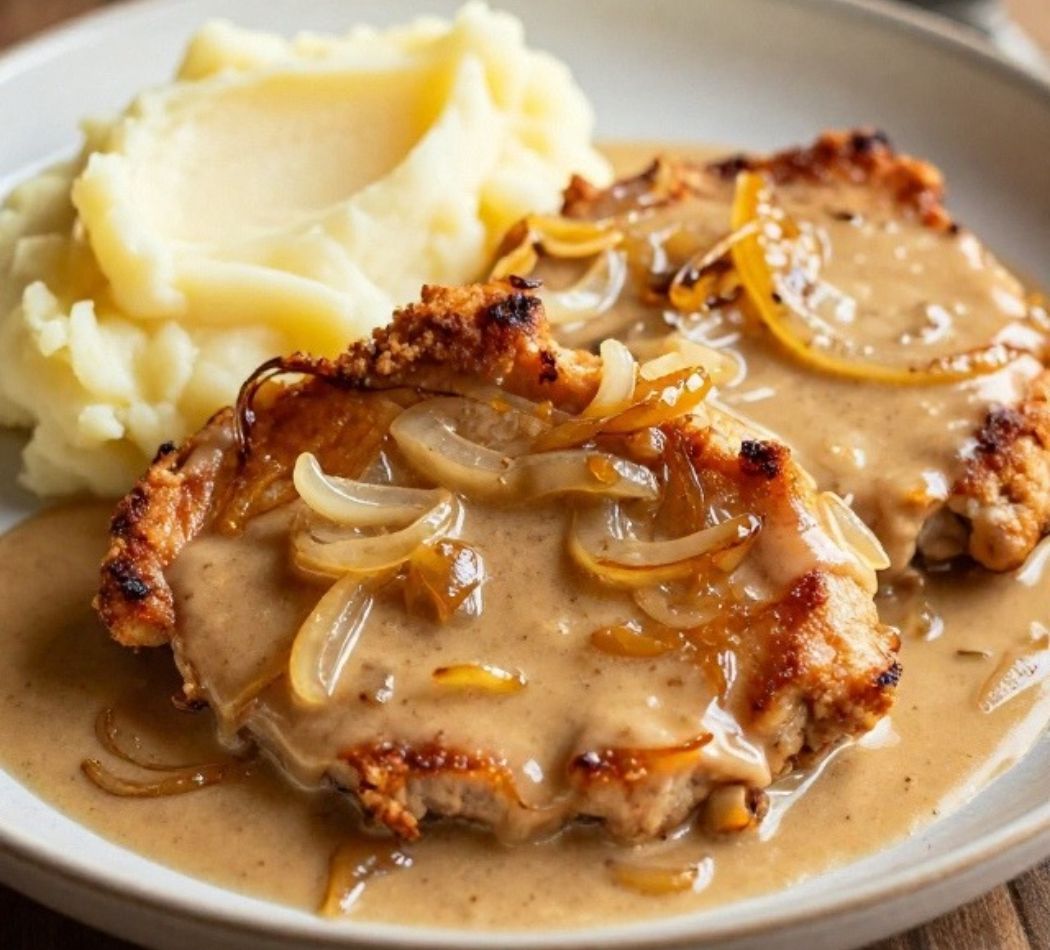
We Tested:
When was the last time a dinner party conversation stopped because of pork chops? If you are like most home cooks, the answer is probably never. Pork chops have a reputation problem. They are the dry, bland cousin of the chicken breast—a cut that people buy out of habit but cook with fear.
But here is the surprising truth that most modern recipe blogs gloss over: Smothered pork chops are not supposed to be tough. In fact, when done correctly, this dish is a masterclass in turning an inexpensive, lean cut into something that falls apart under the weight of a fork, bathed in a gravy so savory it demands a spoon.
As we settle into 2026, the culinary world has swung back toward technique over trend. While air fryers and 15-minute meals had their moment, there is a quiet resurgence of dishes that require a heavy skillet, a watchful eye, and a bit of patience. Smothered pork chops—a staple of Southern and Cajun cooking—sit right at the intersection of nostalgia and smart economics.
Whether you are a beginner who has accidentally made “pork shoe leather” in the past or an intermediate cook looking to refine your gravy game, this deep dive is designed to change the way you think about the humble chop. We are going to look at the history, the science of braising, the regional debates (oven vs. stovetop), and the exact steps to get that silky, onion-rich sauce that defines the dish.
The Background: From Cajun Fields to Your Sunday Table
To understand smothered pork chops, you have to understand the word “smother.” In culinary terms, it does not mean to suffocate; it means to cover. Specifically, it refers to a technique of braising meat in a flavorful liquid or sauce until it is incredibly tender.
The Cajun & Creole Roots
While the dish feels deeply American, its soul is rooted in the resourcefulness of Louisiana cooks. Originally, “smothering” was a method used for inexpensive cuts of meat—often game or older farm animals—that benefited from a long, slow bath in liquid to break down tough fibers. It was fuel for farmers and laborers, served with rice to stretch the meal and provide the energy needed for a long day in the fields.
Over time, the dish migrated from the bayou to the broader Southern table, becoming a fixture of “Sunday Supper.” It was the original one-pot meal: sear the meat, build a gravy in the same pan, and let the oven do the work while you set the table.
The Modern Misunderstanding
The problem arose in the mid-to-late 20th century with the rise of the supermarket pork chop. As breeders focused on leanness (to combat the “other white meat” stigma of fat), the pork chop lost much of its intramuscular fat. Suddenly, the traditional long-cook methods resulted in dry, chalky meat because there was no fat left to baste the fibers. This led to the modern fear of overcooking pork, which ironically, made smothered pork chops worse when recipes tried to rush the cooking time.
The 2026 approach corrects this. We now know that a thick-cut, bone-in chop (or a high-quality thick boneless chop) is essential. We also know that the magic of smothering isn’t just about heat; it is about the Maillard reaction (browning) combined with the gelatinization of flour in the gravy.
The Science of the Sear and the Simmer
Most recipes tell you what to do. We want to explain why you are doing it. If you understand the physics of the pan, you can improvise with confidence.
Why You Must Dredge (But Lightly)
Many recipes call for dredging the chops in flour before searing. This is not just for texture. The flour creates a barrier that encourages browning (the Maillard reaction) while preventing the pork juices from escaping immediately. More importantly, the residual flour that falls off into the pan becomes the foundation of your roux.
The Insight: If you are gluten-free, you can absolutely use a 1:1 gluten-free flour blend, but you must be careful with the heat. Alternative flours burn faster than wheat flour, so keep your pan at medium rather than medium-high.
The “Burn” Warning: Onion Cooking
The single biggest differentiator between a mediocre smothered pork chop and a great one is the onions. You are not just sweating them; you are browning them.
-
The Mistake: Cooking onions until translucent and calling it done.
-
The Fix: You need 8 to 10 minutes of active sautéing to get them deeply golden and sweet. If you rush this, your gravy will taste sharp and raw. If you burn them, the gravy will be bitter. The sugar in the onions needs time to caramelize to provide the natural sweetness that balances the savory broth.
The Great Debate: Oven vs. Stovetop vs. Slow Cooker
If you search for smothered pork chops in 2026, you will find three distinct camps. Here is the breakdown so you can choose your fighter.
1. The Stovetop Purist (Fastest)
Best for: Weeknight dinners with thicker, high-quality chops.
In this method, you sear the chops, remove them, build the gravy, and then return the chops to the pan to finish cooking in the liquid. The entire process takes about 25 to 40 minutes.
-
Pros: Fast, keeps the kitchen cool, and gives you total control over the gravy consistency.
-
Cons: Risky for beginners. If the heat is too high, the chops will overcook before the gravy thickens. It requires a watchful eye and a meat thermometer. The target temperature for juicy pork is 145°F, followed by a rest.
2. The Oven Braise (Foolproof)
Best for: Guaranteed tenderness and feeding a crowd.
America’s Test Kitchen and other authorities often recommend a hybrid approach: sear on the stove, then transfer the covered skillet to a 300°F oven for 1.5 hours. Alternatively, some recipes bake at 350°F for about 2 hours.
-
Pros: The ambient heat surrounds the meat, cooking it evenly. The long, low braise breaks down connective tissue in a way that stovetop cooking cannot replicate for thicker chops.
-
Cons: Takes significantly longer. The texture can become too soft (mushy) if you use thin, boneless chops, which will disintegrate over 90 minutes.
3. The “Shortcut” Slow Cooker (Trend Alert)
Best for: Busy families who prioritize convenience over crust.
This method involves dumping cream of mushroom soup, onion soup mix, and pork chops into a Crockpot.
-
The 2026 Verdict: This is a different dish. It is a creamy, salty, comforting casserole, but it is not a traditional smothered pork chop. The sear is missing, and the gravy relies on sodium-heavy canned soups rather than the fond (browned bits) from the meat. It is delicious in its own right, but it lacks the depth of a scratch gravy.
Expert Recommendation: For the best balance of flavor and texture, use the Stovetop-to-Oven Hybrid. Sear on the stove to build flavor, then let the oven gently finish the job.
The Gravy Framework: Building Depth Without Canned Soup
The soul of this dish is the gravy. A proper onion gravy should be silky, savory, and deeply aromatic. Here is the framework that most recipes miss: The Two-Stage Liquid Addition.
-
Deglaze with a Splash: After searing the chops and removing them, add a small amount of broth (about 1/4 cup) to the hot pan. Scrape the bottom with a wooden spoon. This lifts the fond—the concentrated flavor blocks.
-
The Roux: Sprinkle flour over your browned onions. Stir constantly for 1 to 2 minutes to cook out the raw flour taste. This is crucial. If you skip this, your gravy will taste like paste.
-
The Whisk: Add the remaining broth slowly while whisking. This prevents lumps. Bring it to a simmer; it should thicken almost immediately.
The Secret Ingredient: Acid and Umami
Many home cooks find their gravy tastes “flat.” The missing element is usually acid. Just as a squeeze of lemon wakes up a fish dish, a teaspoon of apple cider vinegar or a splash of Worcestershire sauce at the end of cooking cuts through the fat and makes the pork flavor pop.
Practical Tips & How-To: The 2026 Master Recipe
Here is a synthesis of the best techniques from tested sources, tailored for the modern kitchen.
Step 1: Prep and Season
Pat your chops completely dry with paper towels. Moisture is the enemy of browning. Season generously with salt, pepper, garlic powder, and a pinch of paprika (for color and subtle smokiness). Let them sit at room temperature for 15 minutes. If you are using thin, boneless chops (under 1/2 inch), reduce your cooking time drastically—they will cook in minutes.
Step 2: The Hard Sear
Heat a heavy skillet (cast iron or stainless steel) over medium-high heat with a high-smoke-point oil. Sear the chops for 3 to 4 minutes per side until they have a deep, golden crust. Do not move them while they sear. Remove them to a plate. They will not be cooked through yet.
Step 3: The Onion Base
Lower the heat to medium. Add butter and your sliced onions (sweet Vidalia or yellow onions work best). Sauté until they are soft and browned, about 8 to 10 minutes. Add minced garlic and fresh thyme for the last 30 seconds.
Step 4: The Gravy Build
Sprinkle 2 to 3 tablespoons of flour over the onions. Stir to coat. Cook for 1 to 2 minutes. Whisk in 2 cups of chicken broth (or a mix of broth and a splash of milk for a creamier version). Add a bay leaf. Simmer until thickened.
Step 5: The Finish
Return the chops to the pan, nestling them into the gravy. Spoon some onions over the top. If using the oven method, cover and bake at 300°F for 45 minutes to 1 hour (for thick chops). If finishing on the stovetop, cover and simmer on low for 10 to 15 minutes until the pork reaches 145°F.
Step 6: The Rest
Let the chops rest in the gravy off the heat for 5 minutes. This allows the juices to redistribute.
Common Mistakes and How to Solve Them
Even experienced cooks stumble here. Here is the troubleshooting guide.
| The Problem | The Cause | The Solution |
|---|---|---|
| Tough, Dry Chops | You used thin, boneless chops and cooked them too long. | Buy thick chops (1 inch+). Use a meat thermometer. Pull them at 145°F. The braise should be gentle. |
| Pale, Flavorless Gravy | You didn’t brown the onions or the meat properly. | The fond (brown bits) is flavor. Don’t be afraid of a dark sear. Use a heavy pan that retains heat. |
| Lumpy Gravy | Flour was added to hot liquid without whisking. | Make a slurry (flour + cold water) or whisk the flour into the onions before adding broth. |
| Gravy Too Thick/Thin | Incorrect flour-to-liquid ratio. | Too thick? Add broth. Too thin? Simmer uncovered for a few minutes to reduce. |
Pros, Cons, and Balanced Analysis
Is this the right dish for your table tonight? Let’s weigh it.
The Pros:
-
Cost-Effective: Pork chops are significantly cheaper than beef or even chicken breasts in many markets.
-
Deep Flavor: The combination of seared meat and caramelized onions creates a complexity that a marinade cannot achieve.
-
Versatile: It works with rice, mashed potatoes, egg noodles, or even grits.
-
Reheats Well: The flavors often deepen the next day.
The Cons:
-
Time Investment: A proper braise takes at least 45 minutes to an hour. It is not a 15-minute meal.
-
Cleanup: You will likely use a skillet and a baking dish (if doing the oven method), plus a plate for resting.
-
Sodium Risk: If you use canned broth and add salt, it can easily become over-salted. Use low-sodium broth and taste before adjusting.
Future Trends: What 2026 Holds for Comfort Food
Looking ahead, the smothered pork chop is evolving. Here are the trends we are watching.
The “Better-for-You” Braise
As GLP-1 medications and high-protein diets dominate the cultural conversation, cooks are looking for ways to keep comfort food relevant. We are seeing a rise in bone broth-based gravies (higher protein, lower sodium) replacing canned soups. The focus is on collagen-rich sauces that feel indulgent but support metabolic health.
Global Infusions
The classic onion gravy is being remixed. Home cooks are experimenting with adding smoked paprika (Spanish style), miso paste (for umami depth), or even a touch of gochujang for heat. The technique remains the same, but the flavor profile is global.
The Air Fryer Sear
While you cannot braise in an air fryer, a new technique involves using the air fryer to get a fast, crispy crust on the chops before transferring them to a stovetop gravy. It is a niche technique, but it solves the “splatter” problem of pan-searing.
Key Takeaways
-
Cut Matters: Use thick-cut chops (bone-in preferred) to withstand the braise without drying out.
-
Dry and Sear: Pat the meat dry and get a hard sear. The brown bits are the flavor base.
-
Brown the Onions: Do not rush the onions. They need 8–10 minutes to develop sweetness.
-
Temperature is King: Pull the pork at 145°F. The carryover cooking and resting will bring it to a safe, juicy temperature.
-
Acid Finishes: A splash of vinegar or Worcestershire at the end balances the richness.
Frequently Asked Questions (FAQs)
Q: Can I use boneless pork chops?
A: Yes, but be careful. Boneless chops cook much faster. If you are using the oven method, reduce the time significantly or use a lower temperature (300°F) and check them at 30 minutes. Bone-in chops are more forgiving because the bone insulates the meat.
Q: What is the best side dish for smothered pork chops?
A: The classic choice is mashed potatoes because they act as a sponge for the gravy. However, white rice is traditional in Louisiana, and egg noodles or creamy grits are excellent alternatives.
Q: Can I make this in a slow cooker?
A: Yes, but the texture will be different. For a slow cooker, sear the chops first (optional but recommended), then place them in the crockpot with the gravy ingredients and cook on low for 6–7 hours. Note that the gravy will be thinner unless you add a cornstarch slurry at the end.
Q: How do I fix salty gravy?
A: If your gravy is too salty, the best fix is to add more liquid (unsalted broth or water) and a splash of acid (vinegar or lemon juice). You can also add a peeled, quartered potato to the simmering gravy for 15 minutes; the potato absorbs excess salt.
Q: Can I freeze leftovers?
A: Yes. Smothered pork chops freeze well. Place the chops and gravy in an airtight container for up to 3 months. Thaw overnight in the fridge and reheat gently on the stovetop or in the microwave.
Sources and Further Reading
The techniques and insights in this article are synthesized from established culinary authorities and tested recipes.
-
The Real Food Dietitians: For the stovetop method, temperature guidelines (145°F), and gluten-free adaptations.
-
America’s Test Kitchen: For the oven-braise technique at 300°F and the science of tenderizing tough chops.
-
Southern Living: For the historical context of Cajun/Creole smothering traditions and the rice-based serving suggestion.
-
Leite’s Culinaria: For the classical onion gravy approach and serving suggestions (collard greens, cornbread).
-
Instacart Recipe Collection: For the Instacart-specific ingredient ratios and the traditional flour-dredge method.

Novara Lin
Senior Editor & Clean Beauty Analyst
Novara Lin is a clean beauty researcher and wellness editor dedicated to demystifying modern skincare and evidence-based living. With a background in formulation science and consumer health reporting, she specializes in analyzing complex ingredient profiles, evaluating product safety, and bridging the gap between clinical research and daily self-care routines. Her work focuses on helping readers cut through industry noise to build minimal, highly effective routines rooted in transparency and skin health. When she isn’t testing active formulations or auditing non-toxic household choices, Novara leads editorial strategy for NovaRa Pure.